Coworking Co. - Creative Space WordPress Theme
© 2026 Highsea studio.
All rights reserved.
Creative Space WordPress Theme
demoThank you for purchasing our product! If you have any questions or suggestions, please feel free to contact us via contact form on our portfolio page.
The theme has several page templates that you may use for your needs. They are:
templ-home.php) - our nice and shiny home pagetempl-blog.php) - to make a Blog pagetempl-events.php) - to make an archive page for built-in CPTs eventstempl-events-tickera.php) - to make an archive page for Tickera CPTs eventstempl-about.php)templ-contact.php)templ-plans.php) - to showcase membership planstempl-schedule.php) - to display a calendar with bookings or any other related informationSome words about recommended sizes of the images. They are:
WooCommerce -> Settings -> Products -> Display:
This theme acts as a one page niche landing page with an advanced functionality. There is no separate Contact page or About page etc. It doesn't mean that you cannot create any other pages. Of course you can! however, there is no such special pages mentioned above. And the idea is that the items in the main menu (as well as mobile and footer menus) are linked to certain sections of the homepage and not on other (and/or external) pages. Such a menu will be autogenerated whenever you have chosen a page with "Home page" template as a front page of the website and a certain menu item will be added every time when you enabling a particular home page section.
Important notice: a menu item for a particular section will be added only if a related option is enabled:
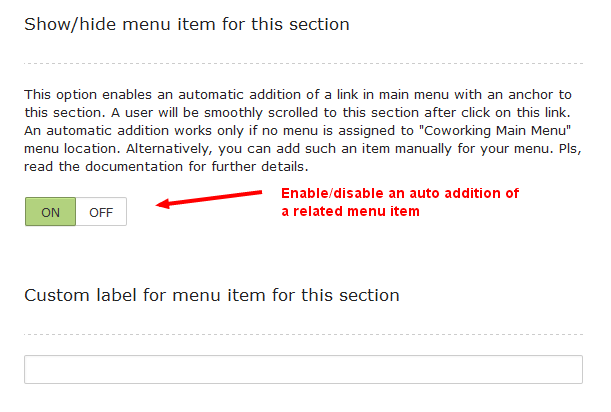
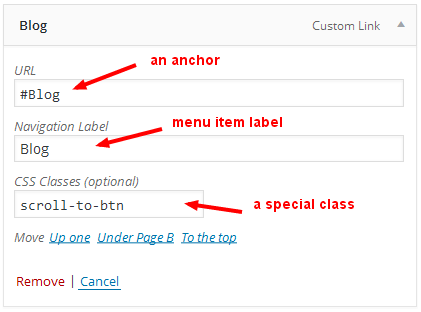
However, sometimes it is needed to create a custom menu and use it on the website. In this menu both links to separate pages and links with
anchors on sections of home page can be added. Just create a custom link and add desired menu item label, a special anchor (the list of
all anchors is present below) as an URL and a special class scroll-to-btn:
The complete list of sections, default labels for its menu items and anchors:
#Introduction#About#Benefits#Mission#Pricing#Store#Events#Blog#ContactThe same is appliable for mobile and footer menus. Actually, mobile menu always the same as main menu. But footer menu can differ from main menu. But, as I said, it is also possible to add custom links with anchors to footer menu in the same way as for main menu.
In order to make it possible to navigate to the home page from any other internal page, we recommend to add a full URI to homepage with an anchor (e.g. "http://highseastudio.com/demo/coworking/#About") rather than just an anchor (e.g. "#About").
Starting from version 1.0.10 settings for logo can be found on the theme options page under "Logo settings" tab and in the WP Customizer. But only in WP Customizer it is possible to change logo images!
In order to change the logo, please, go to WP Customizer. It can be done either by clicking on "Customize" button on the top admin panel
when you are on the home page or by clicking on Appearance -> Customize link in the admin menu:
Click on Home page settings (this menu item will be visible ONLY if you are on the home page!):
Navigate to Logo settings section.
You can decide to use two .png images - light and dark versions of the same image. Use these settings:
First, you have to set height and width of your logo. The default height is 16px and width is 188px, but you can set your own size. Change the values of the corresponding settings and Save them (hit on "Save & Publish" button). Now reload the page.
It is important to set height and width, save them and reload the page BEFORE crop uploaded images!
Second, click on "Select logo" button for Logo A and Logo B settings, upload images, crop them if needed and save settings (hit on "Save & Publish" button).
Why there two logotypes have to be added? Well, Logo A should be a dark version of the logo because the header is white by default, so it will look better if you add something dark:
Logo B is a light version of the logo. Most likely you will use dark slides, so it will look better if you add something light as logo:
The same is for the logo in the footer. You can set your own height of the footer logo, but no greater than 80 px. The width of the logo will be changed proportionally. Just remember to set height first, then save settings, then reload the page and only after that upload/crop your image. These are the settings for the footer logo:
Home page is shiny and attractive and has 11 sections. They are:
Home page that can be seen in our demo is a special page template. In order to use it, you have to create a new page and choose "Home page"
page template for this page. Then, you have to go to Settings -> Reading admin menu and choose "Static page" option for
"Front page displays" setting and choose your newly created page with "Home page" page template.
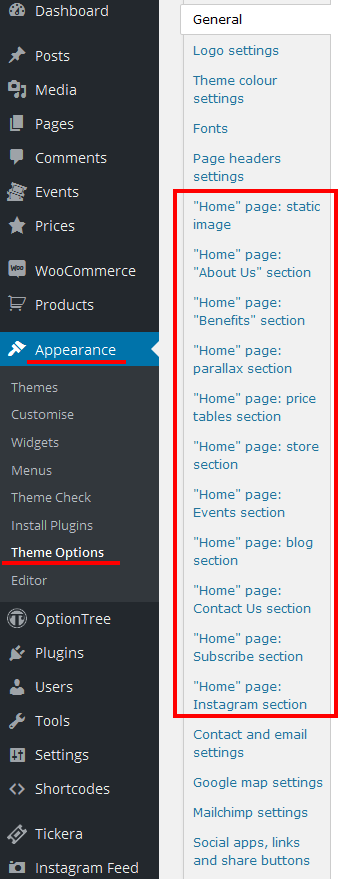
Settings for home page can be found on theme options page.
The first section containes intro of a website. It is possible to change a background image, title (it uses H1 tag), text and show/hide a link and change this link label if needed.
"About Us" section on the home page contains an image slider on the left and some information on the right. It is possible to add images
to the slider, change title (H3 tag), text and show/hide a link and change this link label if needed. Also, it is possible to add a logo
above the title. A link of this section opens a modal window with a simple form. The infornation submitted by this form will be sent to
the chosen email (the one defined under "Contact and email settings" on theme options page or that is defined under Settings -> General
admin menu).
"Benefits" section. This section showcases some features by displaying relevant icons and texts for them. We prepared 8 quality and attractive icons for this section. Additionaly, it is possible to use any Fontawesome icon
There is a special type of option on theme options page:
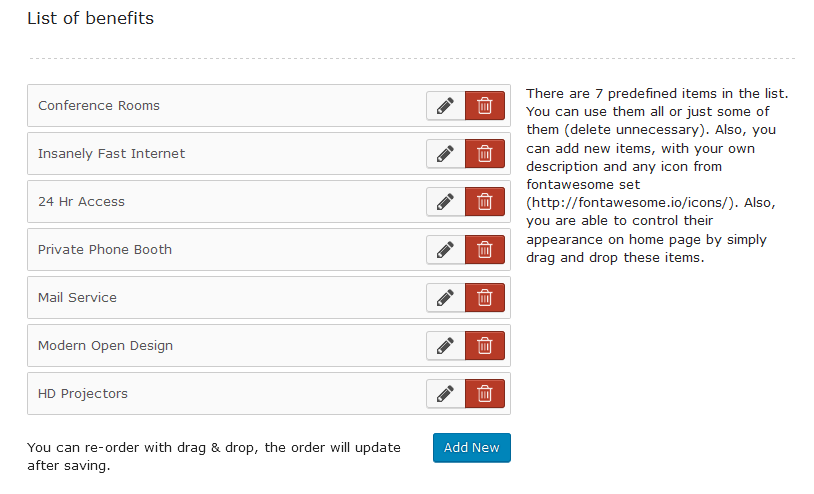
We made it easy to add new/edit and reorder these items. Click on 'pencil' icon in order to edit a particular item:
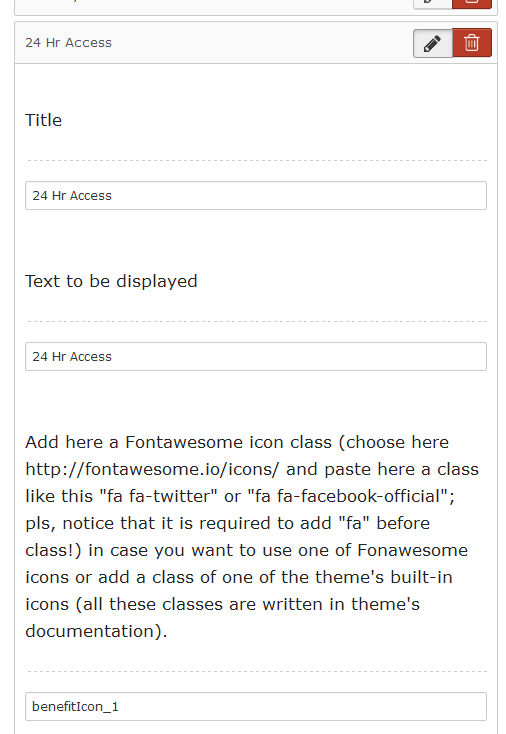
All these fields are decriptive enough and this is a lst of all classes of the built-in icons:
benefitIcon_1benefitIcon_2benefitIcon_3benefitIcon_4benefitIcon_5benefitIcon_6benefitIcon_7benefitIcon_8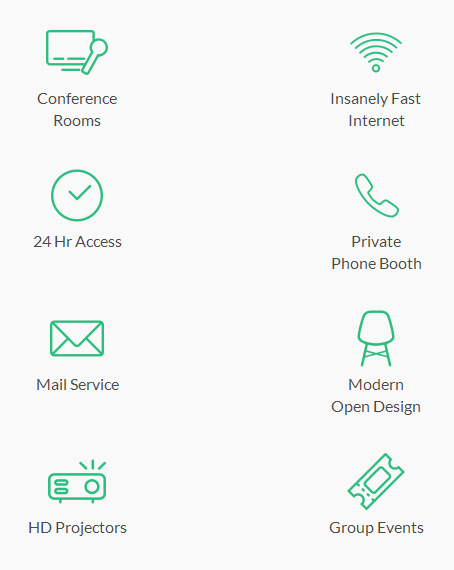
Parallax section is just a small block with an image in the background and nice parallax effect. It is possible to change text (H3) here.
Price tables section. It is possible to use a built-in CPT "Price" or utilise WooCommerce Subscription plugin (not bundled with the theme) and its 'subscription' type of a product in order to display day passes, for instance.
"Join Now" button leads to single product page when WooCommerce Subscription plugin is in use, but it opens a modal window if a built-in
CPT "Price" is used as the items of this section. This modal window contains a simple form. The infornation submitted by this form will be sent to
the chosen email (the one defined under "Contact and email settings" on theme options page or that is defined under Settings -> General
admin menu).
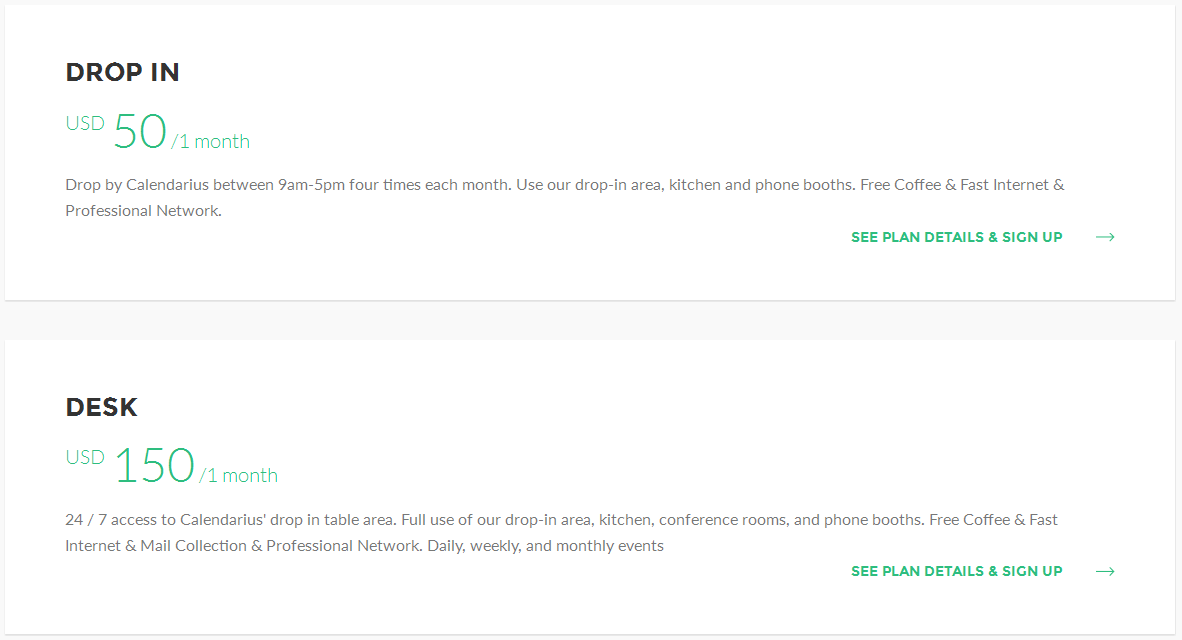
Also it is possible to use another built-in CPT "Membership Plan" in order to display an information about membership plans etc. They look like much the same as "Price" items, the only difference is that their descriptions are plain text and not list items like.
Please, read more about built-in CPTs "Price" and "Plans" here.
Store section. A grid of WooCommerce products. A chosen number of products will be shown here. It is possible to choose what products to isplay: random products or bestsellers or only featured sorted by date or only featured sorted by randomly or products with the highest rating first.
Important: WooCommerce plugin must be activated in order to use this section!
Events section. It is possible to use a built-in CPT "Event" or utilise Tickera - WordPress Event Ticketing plugin (free) and its CPT.
The background of this section displays an image of the first event post in the list and changes to an image of the other event post on hover over this post. Neat, huh? :)
Also, please, read more about built-in CPT "Event" here.
Blog section. Displays a chosen number of posts.
Contact Us section contains Google map on the left and some contact info on the right. Of course, it is possible to change this information and define custom coordinates for Google map etc.
It is possible to show/hide an email in this section. There will be displayed an email defined under "Contact and email settings" on theme options page.
Mailchimp subscription form. MC API key and list id must be added in "Mailchimp settings" tab on theme options page in order to use this form.
Instagram section.
Important: Instagram Feed plugin (free) must be activated in order to use this section!
Further configuration of the plugin can be done on its settings page in admin area.
First of all create a page and choose template 'About Page'. The page settings will be shown in the metabox.
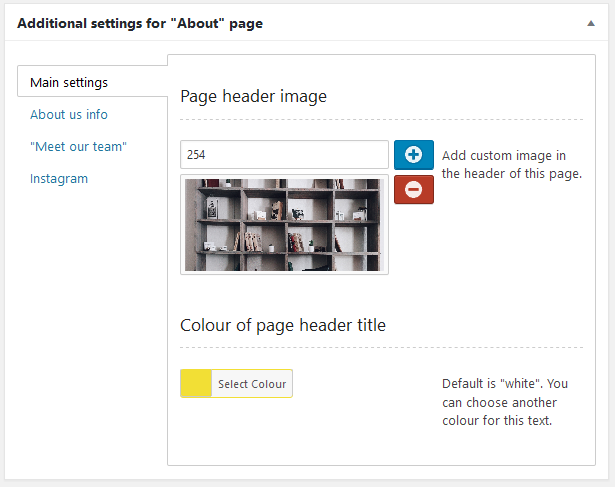
It is possible to add background image there and change the color of the title.
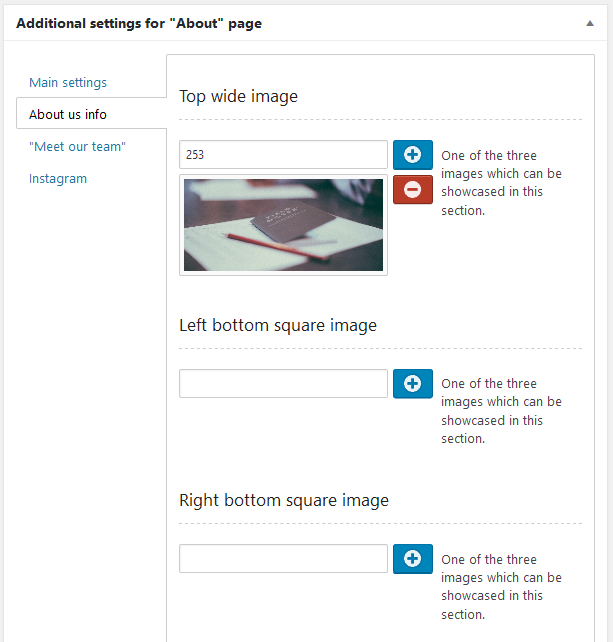
On the page is a section with three images and some text and CTA button. In order to customise the content of this section, proceed to the second tab in the metabox:
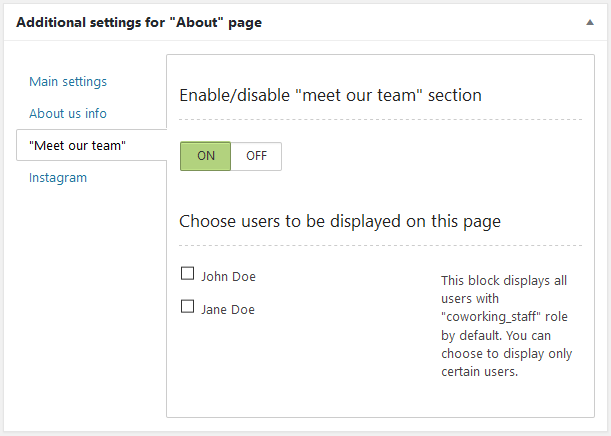
The next section of the page is "Meet Our Team".
Important: 'Profilini' plugin (bundled with the theme) must be activated in order to use this feature!
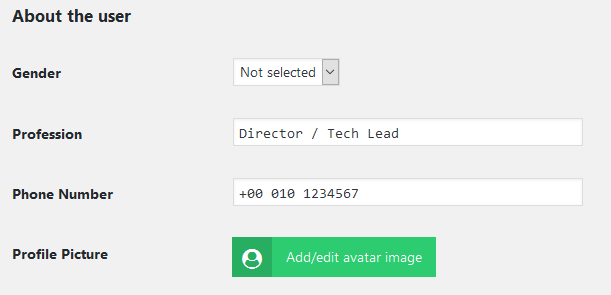
The theme creates a new special user role called 'Coworking Staff'. All users under this role will be shown in this block on 'About' page. So, first of all choose 'Coworking Staff' role for some users and add an avatar and fill in their profession in their profiles:

You have to activate/deactivate the theme if you don't see 'Coworking Staff' role in the dropdown.
It is possible to add some info about a person in 'Biographical Info' textarea (some html tags are allowed: a, br, em, strong). The more important is to add avatar image, profession etc:
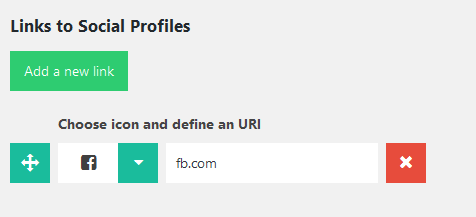
And some links to social profiles:
Now it is a time to enable "Meet the team" block on "About" page. Also, there is a possibility to display only chosen users:
It is possible to display a section with images from your account in Instagram. The similar as on the homepage.
Important: 'Uni Custom Post Types and Taxonomies' plugin (bundled with the theme) must be activated in order to use this feature!
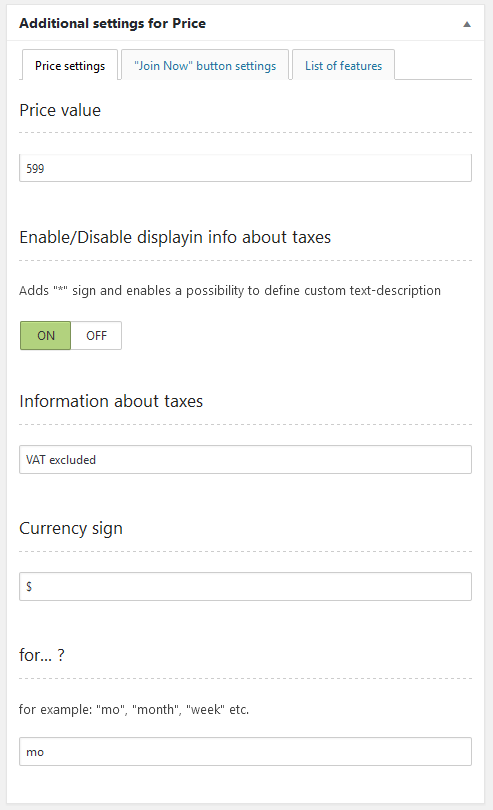
We have created a special post type called "Price". Each of these posts acts like an item in a price table on home page.
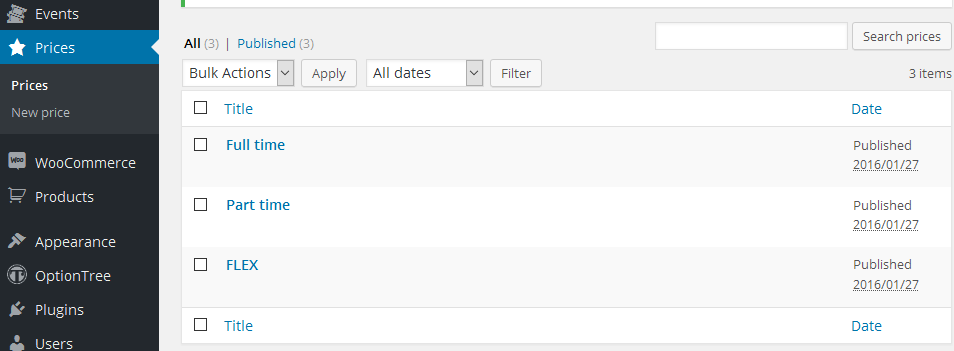
Each price-post has title and some meta fields. Price settings:
"Join Now" button settings:
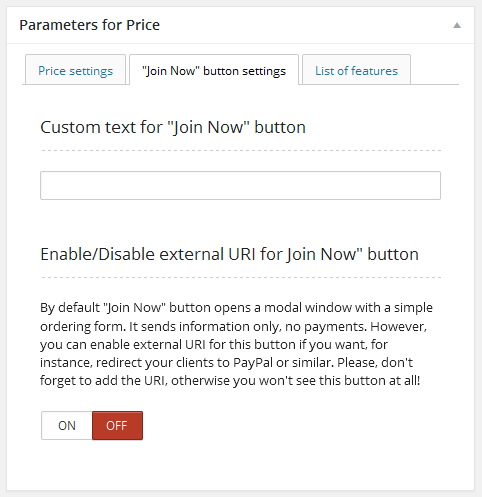
Clicking on "Join Now" button will open modal window with simple form where user can fill in some information about him and send this data. Two emails will be sent as the result of submit of this form - one for the user and anotehr one is for website's admin. Templates both these emails are located in 'email' folder: price-admin.php and price-guest.php
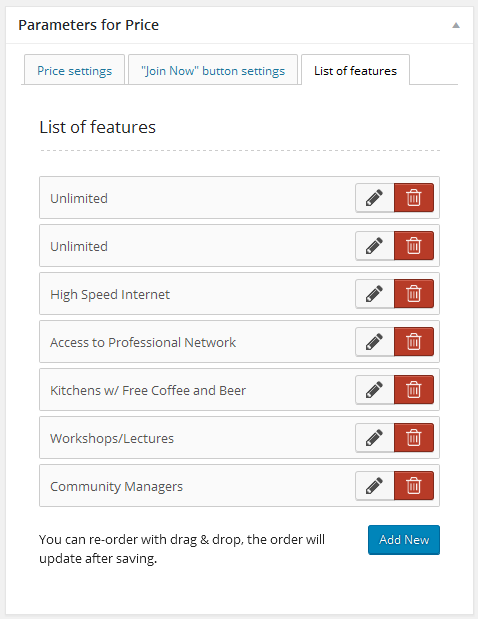
List of features:
It is possible to create custom email templates and use uni_coworking_price_email_filter filter to add them.
Default values are: 'email/price-guest.php' and
'email/price-admin.php' and there is one argument exists to differentiate what template should be used. Values of the argument: 'admin' or 'guest'.
You can display WC products-subscriptions instead of posts of CPT "Price".
WooCommerce Subscriptions plugin (not bundled with the theme!) must be activated in order to use this functionality
First, at least one product must be created and type 'subscription' must be chosen for it:
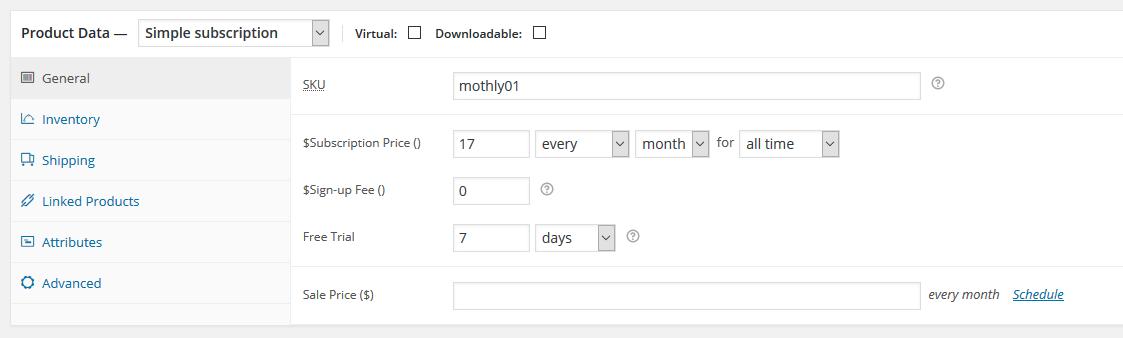
An additional metabox with "List of features" settings can be found on product page edit screen. It is identical to the one used for built-in CPT "Price"
It is possible to display up to 3 items/subscriptions on home page. So, second, 'Enable/disable support of WooCommerce Subscriptions extension' option must be enabled:
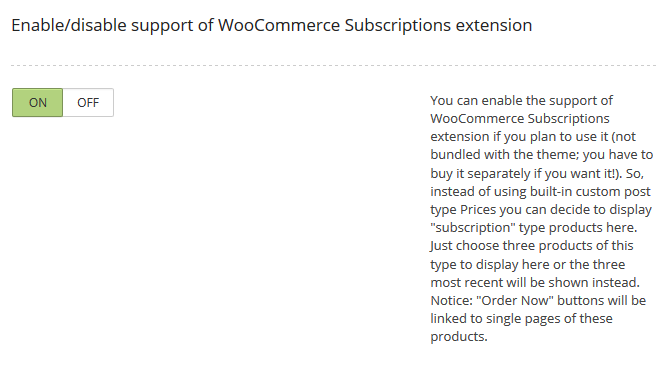
Third, it is possible to choose three desired subscriptions by using the three dropdowns next to mentioned option. It is not required to choose any products-posts. Three most recent will be shown in this case.
We have created a special post type called "Membership Plan". They can be used to display an information about membership plans or similar.
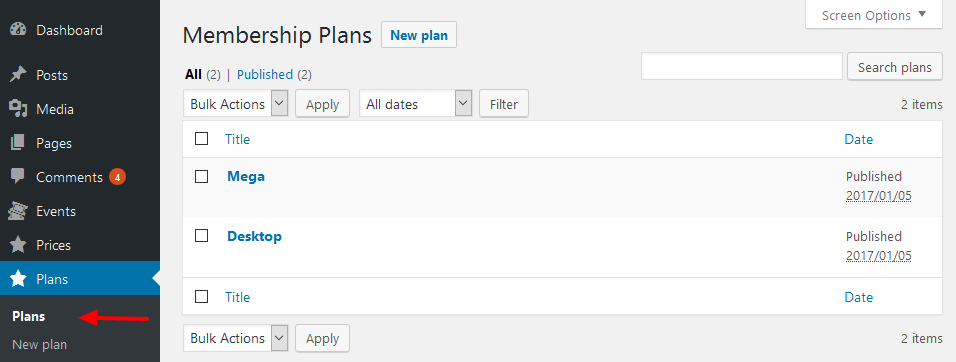
Posts under this CPT have almost the same settings as "Price" posts. The only difference is that the description must be added to the main content editor as a text, but not as list items.
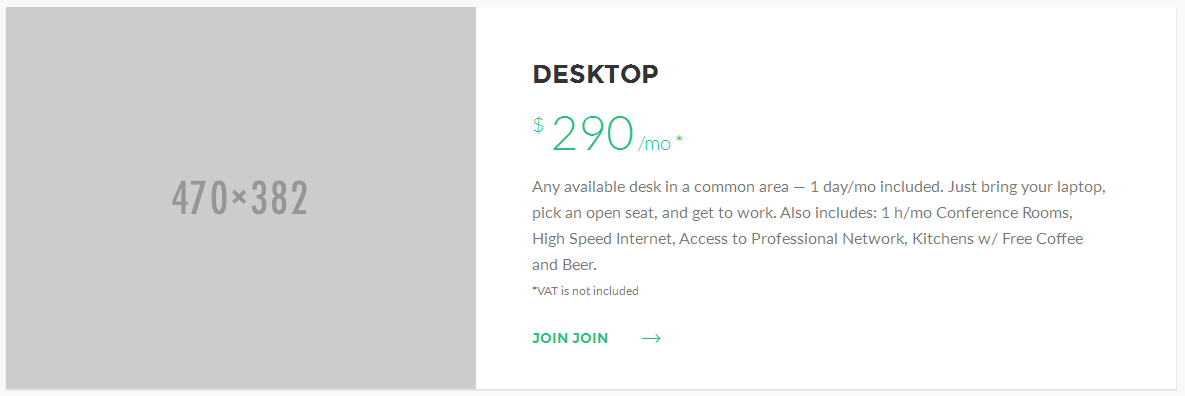
It is possible to display membership plans items on the homepage (check the theme options) as well as on a page with 'Membership Plans' page template. First, create a new page, choose 'Membership Plans' page template for this page then and publish it. The special settings will be shown on this page:

It is possible to customise this page a little bit - choose background image, a color of the page header title and select posts under "Membership Plan" CPT to be displayed on this page (or leave all the checkboxes unchecked in order to display all the posts created). This is how one item looks like:
Moreover, it is possible to integrate the theme with Calendarius plugin (bundled with the theme!) and display the information about membership plans fetched by Cobot.me API. Cobot is a management software for coworking spaces, office hubs, and flexible workspaces around the world. The settings - you have to add an ID of a Calendarius calendar configured to work with Cobot.me and enable displaying Cobot.me membership plans:
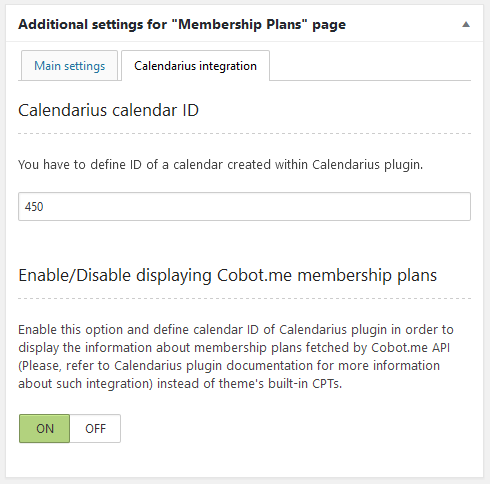
Important: you have to activate 'Calendarius' plugin (bundled with the theme) to use this feature!
And the results:
Please, read more about using 'Calendarius' plugin here.
Important: 'Uni Custom Post Types and Taxonomies' plugin (bundled with the theme) must be activated in order to use this feature!
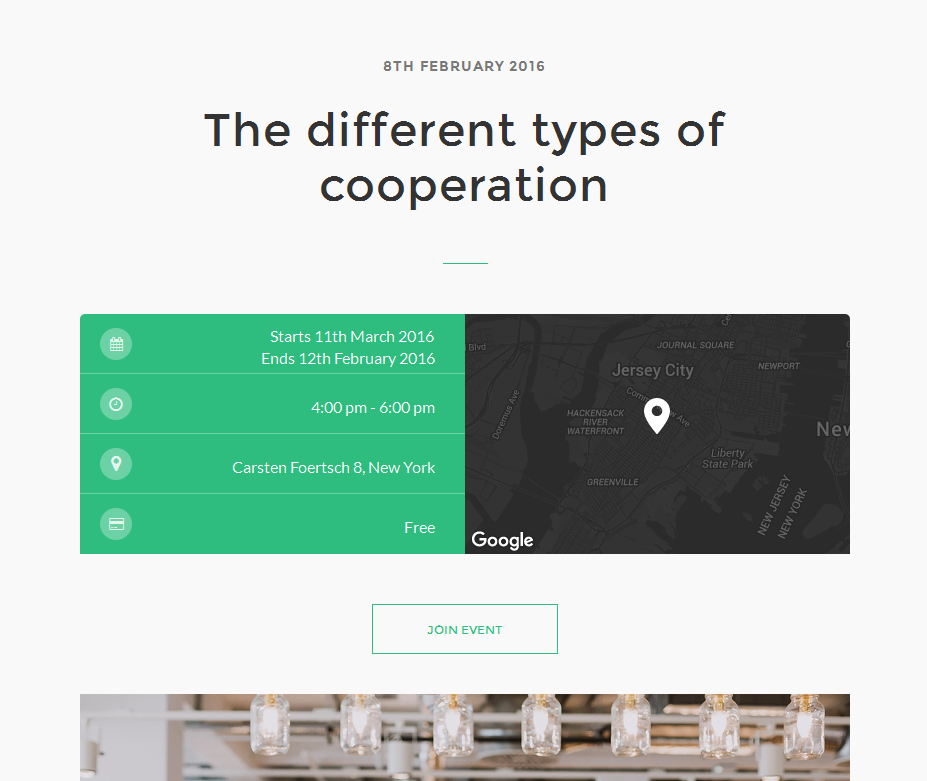
We have created a special post type called "Event".
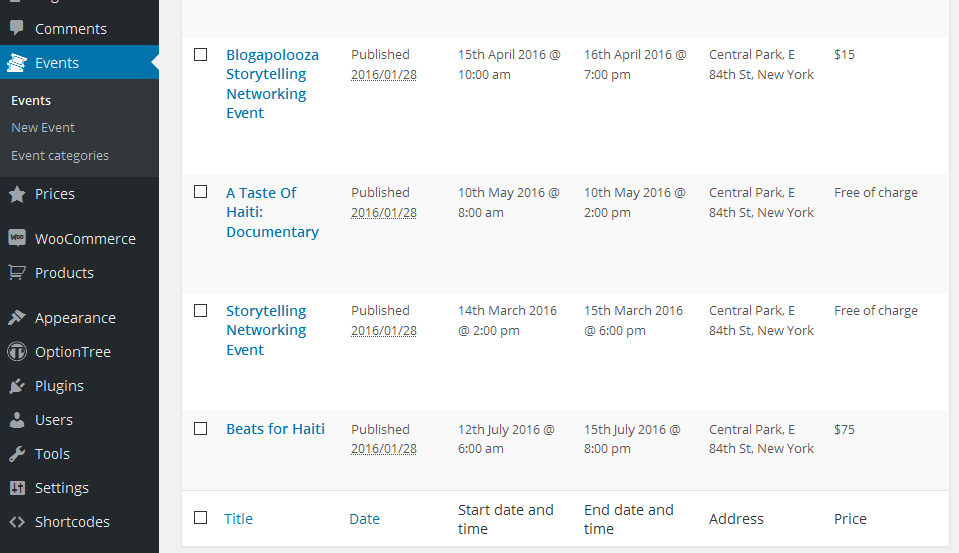
Each event-post has title, contet editor and some meta fields.
On "Additional ino" tab tehre are settings for background image changing, defining start and end dates and times, defining an event address and price.
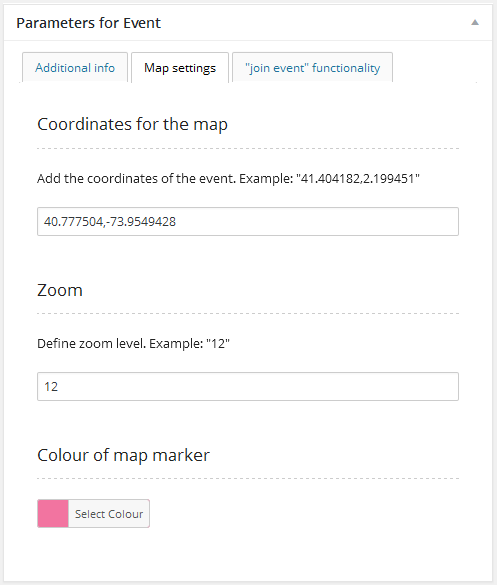
Map settings:
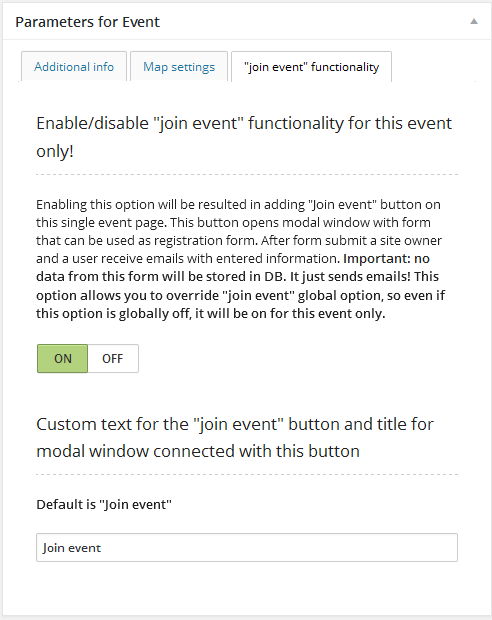
"Join event" functionality settings:
And this is how it look like on the website (the screenshot is taken from this event post):
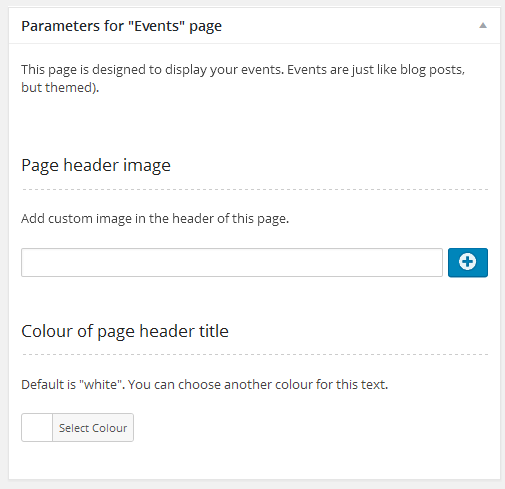
We have created nice page template for events archive page. It acts like a blog page, but for CPT "Event". In order to use it, first, a new page must be created and "Events Page" page template must be chosen for this page.
It is possible to add a page header image and adjust a colour of a title (H1 tag).
Html templates of these emails are located in 'email' folder in the theme's folder. It is possible to override them. First, create a copy of the email template you want to change and place it into your child theme. Then use 'uni_coworking_event_email_filter' filter. This is how it can be done:
// email templates filter
add_filter( 'uni_coworking_theme_event_email_filter', 'uni_coworking_child_theme_email_templates', 10, 2 );
function uni_coworking_child_theme_email_templates( $sTemplateName, $sState ) {
    if ( $sState == 'guest' ) {
        return '/email/event-custom-guest.php';
    } else if ( $sState == 'admin' ) {
        return '/email/event-custom-admin.php';
    }
}
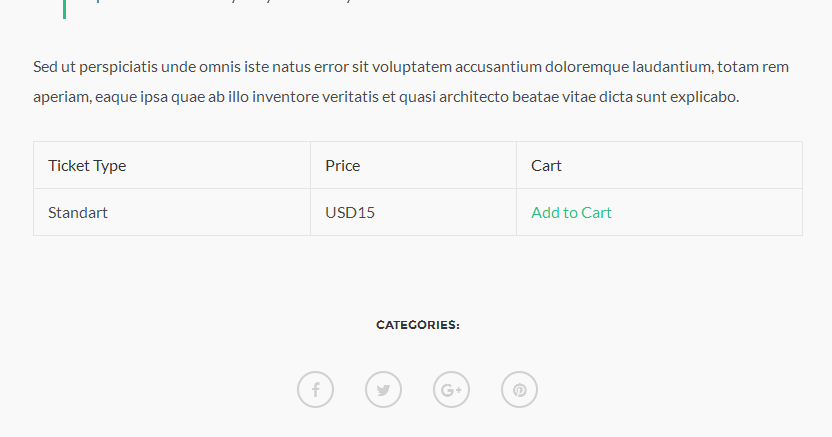
It is possible to use Tickera - WordPress Event Ticketing plugin instead of built-in CPT. Some users prefer one over another. We have added a meta box with map settings identical to the settings added to our built-in CPT. So, single event page of this plugin will also display a map. Actually, single event pages for both CPTs are almost identical. Of course, it is possible to use all the benefits of this plugin too - single page for CPT of this plugin will also display a table with types of tickets and their prices etc. And you may sell tickets with this plugin (the screenshot is taken from this post):
We have also created nice page template for Tickera events archive page. In order to use it, first, a new page must be created and "Tickera events Page" page template must be chosen for this page.
It is possible to add a page header image and adjust a colour of a title (H1 tag).
Important: 'Calendarius' plugin (bundled with the theme) must be activated in order to use this feature!
Please, read more about using 'Calendarius' plugin here.
In order to create a page like Schedule page in our demo you have to do following:
Pls, don't forget to choose 'Coworking default' theme for your calendar. This calendar's theme is created by our designers especially for Coworking WP theme.
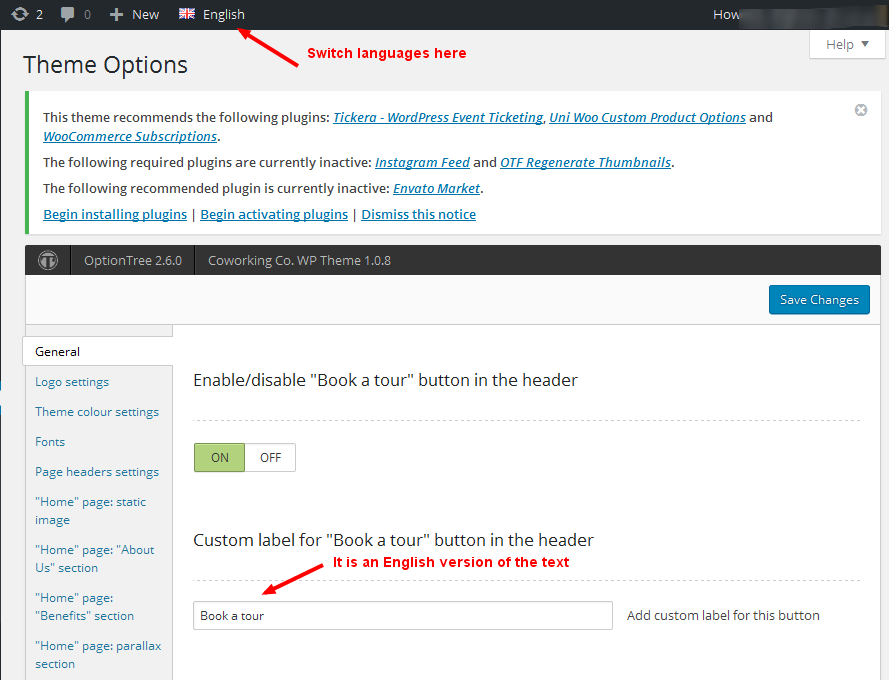
Enable/disable "Book a tour" button in the header.
Custom label for "Book a tour" button in the header.
Enable/disable a custom URI for "Book a tour" button in the header.
Custom URI for "Book a tour" button in the header.
Enable/disable preloader for the website.
Enable/Disable displaying blog/posts archives page with a sidebar.
Enable/Disable displaying single post page with a sidebar.
Enable/Disable displaying single event page with a sidebar.
Enable/Disable displaying similar posts on single post page.
Excluded categories of products. Check here those categories which you want to hide and want to exclude from the list of categories on the website (shop page and single product page). However, they still will be accessible directly!
Enable/Disable displaying similar events on single event page.
Enable/disable a section with social links/icons in footer.
Text in the footer. Add your own text to the footer.
It is possible to add logo image for logo in header and in footer and control their appearance.
You can choose a primary and a secondary colours of your website.
In addition to the default colours, we have found that using the following pairs of colours also makes a website very appeal:
#2c91ea - #2495f8#c2a476 - #d1ad76#e15b5f - #f0575b#f7a21d - #ffa10eYou can define custom Google fonts here. Please, use the first for regular text and the second for headings. Default are: Lato (300, 300italic, regular, italic, 700, 700italic) and Montserrat (regular, 700)
Page header image on Shop/Product archives pages. This image will be shown on the top of the Shop/Product archives pages
Colour of page header title on Shop/Product archives pages. Default is "white". You can choose another colour for this text.
A lot of option are here. It is possible to control every aspect of appearance of these sections on home page.
It is possible to provide an email address and an information submitted via built-in forms of the theme will be sent to this email address. If no email is defined, admin email of the website will be used. Also, this email will be displayed in Contact section on home page if a related option is set to 'on'.
It is possible to add Google Map API key if needed (Google map will also work without providing this key). Also, it is possible to enqueue Google Map API JS SDK script anywhere on the website. Again, only if you need this, because Google map will also work even if this option is set to 'off'
The theme has a form that is integrated with Mailchimp. You just need to provide Mailchimp API key and List ID.
Facebook application ID. In order to use the built-in FB share link you must create an application on https://developers.facebook.com/ and add its ID here.
Enable/disable Facebook share link
Enable/disable Twitter Tweet link
Enable/disable Google+ share link
Enable/disable Pinterest share link
Also, it is possible to add links to your social profiles on the website.
You should expect to see this notice after the theme is activated.
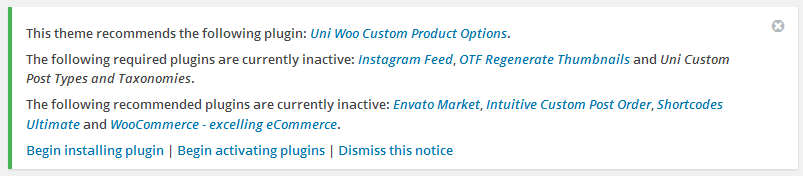
There is some required and some recommended plugins. All the required plugins are bundled with the theme and only required plugins affect the basic functionality of the theme. Recommended plugins just add some additional functionality, they are not neccessary and some of them are not bundled with the theme. You can buy them or download for free (it depends on the particular plugin). 'Recommended' means that we tested how they work with the theme just to be sure that everything will be ok and we think that they can be useful in some particular situations.
The list of required plugins:
Some of the recommended plugins are paid and not bundled, e.g. 'WooCommerce Subscriptions'. So you cannot install them right away.
The list of recommended plugins:
This is how to import Coworking WP theme demo content:
Appearance -> Themes and activate Coworking themeTools -> Import and install WordPress Importer pluginAppearance -> Themes and activate Coworking child themeOptionTree -> Settings -> Importtheme_options.txt file and paste it to 'Theme options'
textarea and click "Import theme options"Settings -> Reading and set 'Home page' as static fron page of your website.Appearance -> Customize and make final adjustements.Install and activate Polylang plugin. The theme fully supports this plugin for making multi language web sites and we recommend to use it. In our opinion, it is fast, easy to configure and reliable plugin for such a purpose.
Go to Settings -> Languages admin page and add default and additional language(s):
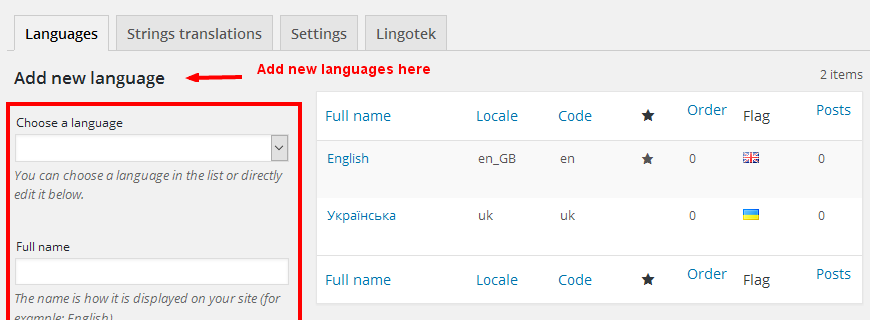
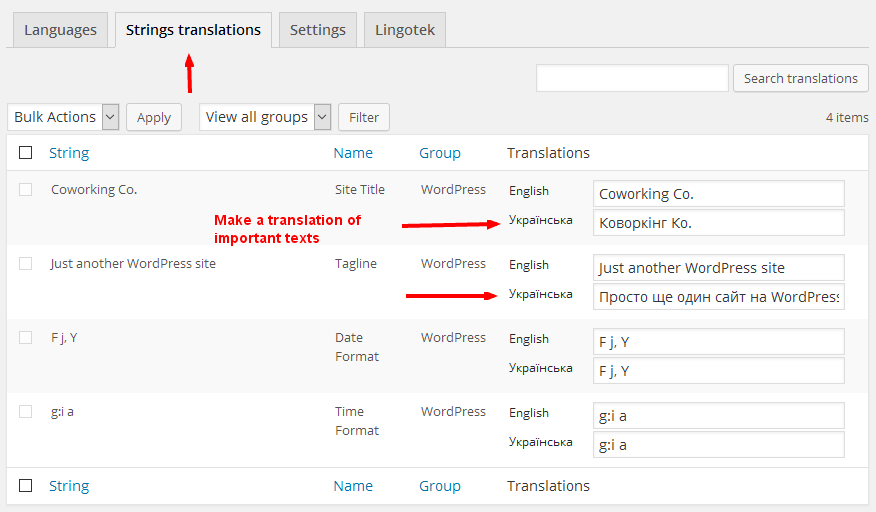
Go to the second tab and translate global texts:
Now it is a time to set all the existed content to the default language. You can see this notice when you are on
Settings -> Languages admin page

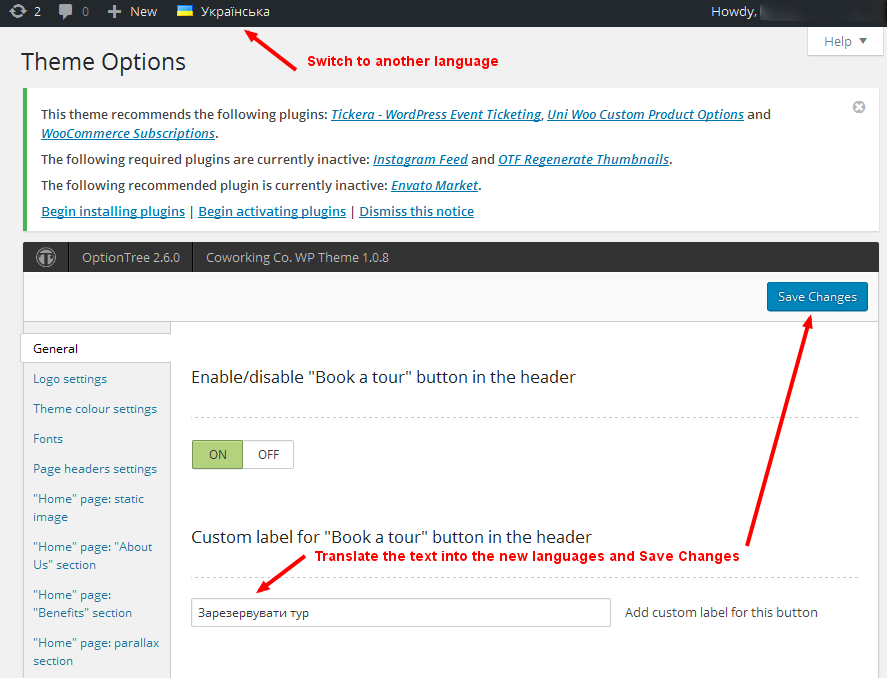
Go to the theme options page and translate all the text on the all the added languages:
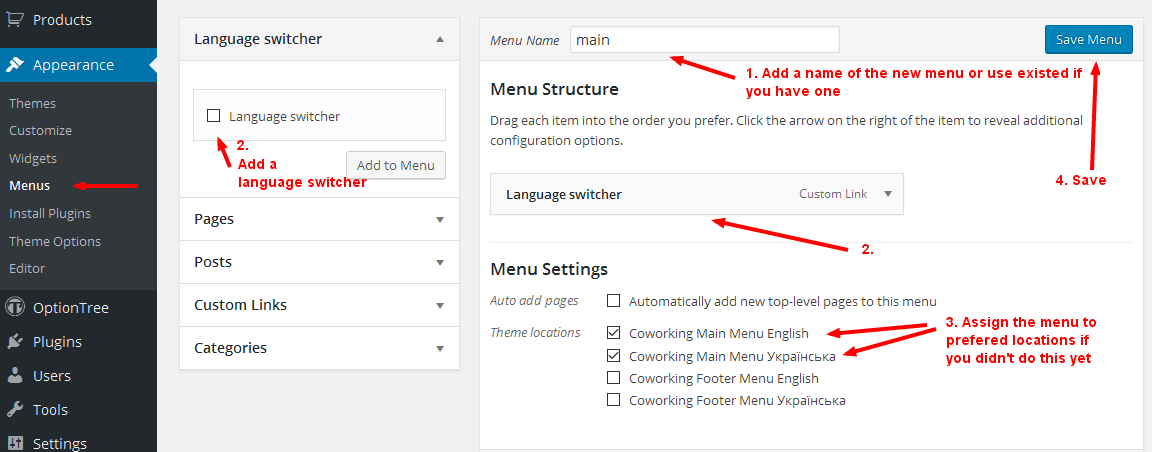
Go to Appearance -> Menus admin page and add a language switcher to be able to switch the languages on the web site:
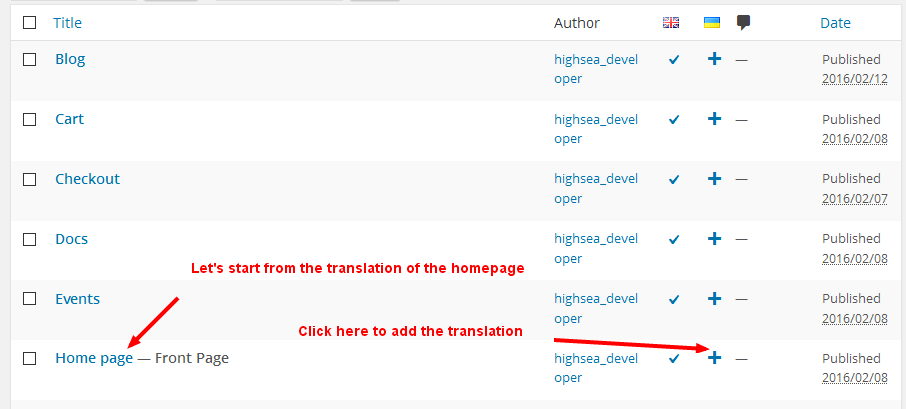
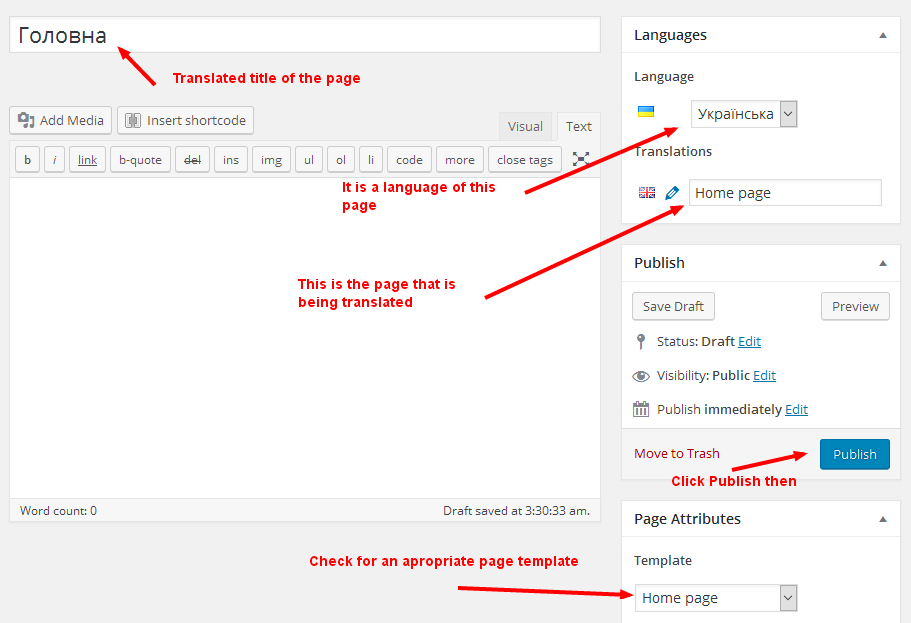
Now it is time to translate the home page:
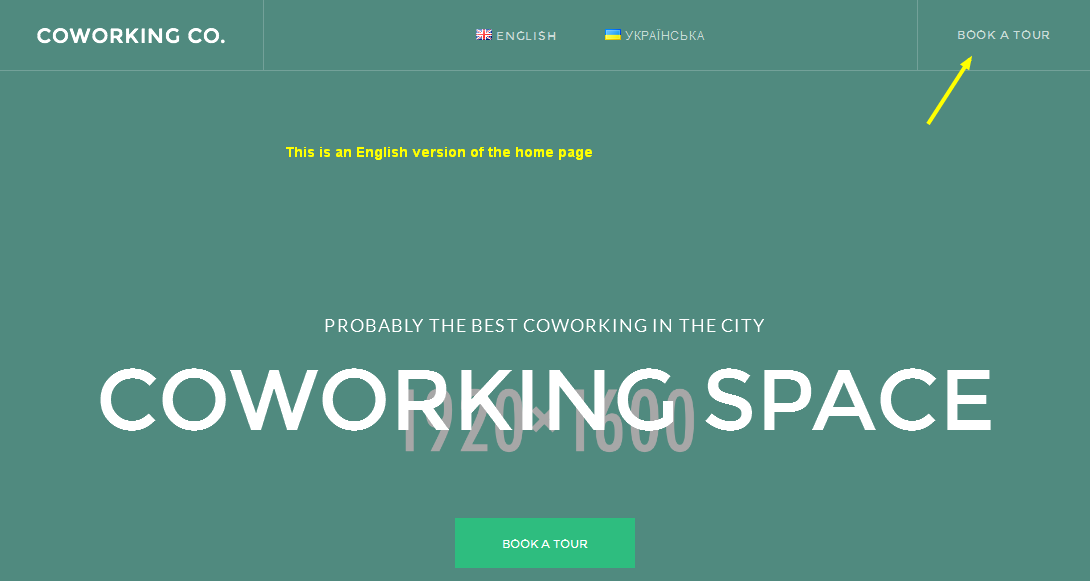
Let's review the results:

You can translate the rest of the content in the same way.
Step by step we migrate all our theme's options from the separate page in the admin area to WP Customizer. Some options are available only in WP Customizer. For example, logo settings. Sometimes it is needed to have different versions of the logotype for different languages. It is possible to achieve that! Please, follow these steps in case you need to add different logos for different languages and to save language specific settings via WP Customizer in general:
Repeat steps 3 and 4 for any other languages you have.
For more information about the using of Polylang and FAQ, proceed to Polylang WP plugin official web site
Appearance -> Customise in admin menu) and click on
Site Identity menu link. You will see "Site icon" option. Click on "Select image" and follow on screen instructions.A: I recommend to use PoEdit or EazyPo software to make a translation. For example, run PoEdit and choose 'New from POT/PO file...' and choose coworking.pot (located within 'languages' folder in the theme's folder). The software will ask you to choose a language of the translation. Choose your language and translate all the strings. Click 'Save' after the translation has been made and save your progress in a file with the same name as original .pot file but with addition of your language tag. Examples: coworking-pl.po, coworking-pt_PT.po. A .mo file with the same name will be added automatically. After that you have two place your newly created files .po and .mo into 'wp-content/languages/themes' folder (create this folder if needed). Now your translation is in safe place and will not be deleted on the theme update.
// switch the subscription email to 'html'
add_filter( 'uni_coworking_theme_mailchimp_variables_filter', 'uni_coworking_theme_mailchimp_variables_func', 10, 1 );
function uni_coworking_theme_mailchimp_variables_func( $aListOfMCVars ) {
    $aListOfMCVars['email_type'] = 'html';
    return $aListOfMCVars;
}
Just add this code to your child theme and that's all.